Author name: devadmin@marketingsweet.com.au

Blog

Understanding the 7 Principles of Interior Design

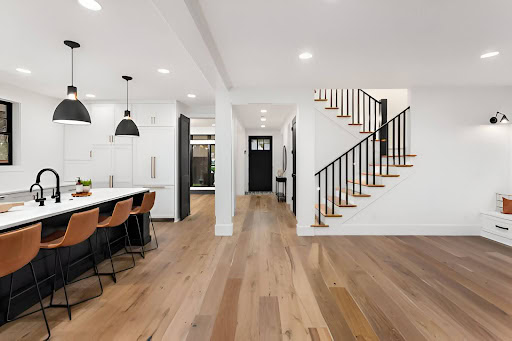
Home Services Painters Near Me Artarmon Chatswood St Ives Surry Hills About Our Work Blog Contact Home Services Painters Near Me Artarmon Chatswood St Ives Surry Hills About Our Work Blog Contact Home Services Painters Near Me Artarmon Chatswood St Ives Surry Hills About Our Work Blog Contact 0404 213 224 Blog August 16, 2024 Interior design is both an art and a science and just like every aspect of life, principles create a balance.  As an interior designer or a homeowner looking to create a beautiful living area, understanding the principles of interior design is essential. These principles guide the design process, helping to create a balanced, harmonious, and beautiful home.  In this comprehensive guide, we’ll have a look at the seven fundamental principles of interior design, which are: balance; proportion and scale; emphasis; rhythm; harmony and unity; contrast; and details. All provide you with the knowledge to transform the aesthetics of any interior space. Balance in interior design If you are looking to decorate your interior space, balance shouldn’t be neglected. Is there anything in life without balance? Of course not.  Balance is an important interior design principle that ensures a room feels stable yet beautiful. It involves distributing visual weight evenly throughout the space, creating a sense of equilibrium. When it comes to interior design, there are three main types of balance: symmetrical, asymmetrical, and radial. Symmetrical balance Symmetrical balance, otherwise called traditional or formal balance, is achieved by mirroring elements on either side of a central axis. This approach to balance is often seen in traditional interiors, where pairs of furniture and decorative items create a formal, harmonious look. For example, placing two identical sofas on either side of a coffee table can create a symmetrical balance in the living room, as is similarly seen in the placement of chairs opposite each other at the dining table. This type of balance brings a sense of order and calm to a room. Asymmetrical balance Asymmetrical balance, on the other hand, involves balancing elements of different sizes, shapes, and colours without mirroring them. This type of balance is more dynamic and less formal and is often seen in modern interiors. For instance, a good interior designer might place a large sofa on one side of the room and balance it with a group of smaller chairs or a piece of artwork on the other. Asymmetrical balance adds visual interest and movement to a space.  Radial balance Radial balance is achieved when elements radiate from a central focal point, creating a circular symmetry. This type of balance is less common but can be incredibly effective in certain spaces, such as dining rooms or foyers. A chandelier hanging over a round dining table, with chairs arranged around it, exemplifies radial balance. This creates a focal point and draws the eye inward, adding a sense of unity to the room.  Proportion and scale Proportion and scale are fundamental principles of interior design that refer to the size of elements to each other and the space as a whole. Let’s have a look at them individually. Proportion Proportion refers to the relationship between the size of one object and another. In interior design, this means ensuring that all elements in a room are in harmony. For example, a large, overstuffed sofa in a small room can feel overwhelming, while a tiny piece of furniture in a large room can look out of place. An interior designer must consider the proportion of each element to create a balanced and visually pleasing space.  Scale Scale relates to the size of elements within the space itself. It’s about ensuring that the furniture and decor are the right size for the room. For instance, a grand chandelier in a small, low-ceilinged room can feel out of scale, while a tiny dining table in a large, open-plan space can look lost. The catch is that small items will fit properly in a small space, while large items will complement a large space. This choice brings out a negative space, making the room look and feel calm. Achieving the right scale ensures that each piece of furniture complements the room and creates a cohesive look. Applying proportion and scale To apply proportion and scale effectively, consider the size of the space and the elements within it. Use larger pieces in spacious rooms and smaller items in more confined areas. Mix different sizes and shapes to add visual interest, but ensure they are in proportion to each other. This will create a harmonious interior that feels balanced and inviting.  Emphasis Every well-designed room has a focal point, an area that draws the eye and anchors the space. The principle of emphasis involves creating a focal point that adds visual interest and directs attention. This could be a piece of furniture, artwork, or architectural feature. Creating a focal point A focal point should be the most visually interesting element in the room. It could be a bold piece of art, a stunning fireplace, or a striking piece of furniture. For example, in a living room, the sofa often serves as the focal point, especially if it’s accompanied by a beautiful coffee table and accent lighting. In a bedroom, the bed typically takes centre stage, adorned with luxurious bedding and flanked by stylish nightstands. Using contrast to create emphasis Contrast is a powerful tool for creating emphasis. Using contrasting colours, shapes, or textures can draw attention to the focal point. For instance, a bright piece of artwork on a neutral wall can immediately catch the eye. Similarly, a unique piece of furniture with an interesting shape or finish can stand out in a room full of more conventional pieces. Enhancing the focal point Once you’ve established a focal point, enhance it with complementary elements. Use accent lighting to highlight the focal point, arrange furniture to direct attention towards it, and avoid cluttering the space around it. This will ensure that the focal point remains the star of the room and

Blog

Top Rated Interior Paints of 2024

Home Services Painters Near Me Artarmon Chatswood St Ives Surry Hills About Our Work Blog Contact Home Services Painters Near Me Artarmon Chatswood St Ives Surry Hills About Our Work Blog Contact Home Services Painters Near Me Artarmon Chatswood St Ives Surry Hills About Our Work Blog Contact 0404 213 224 Blog August 15, 2024 Finally, you’ve decided to give your space some painting. While that is a smart decision, you still need to decide which paint to use. Mind you, when it comes to transforming your living spaces, choosing the right paint is important, as the wrong paint can totally mess things up. If you’re looking to refresh your kitchen, bathroom, or any other part of your house, the right paint can make all the difference. In this guide, we’ll take a close look at the top rated, and best overall interior paints available in Australia, providing you with all the information you need to make an informed decision. Choosing the best interior paint Choosing the best interior paint involves more than just picking a colour. You need to consider the type of paint, finish, durability, and specific needs of the room you’re painting. Here are some important considerations: Types of interior paints There are several types of interior paints to choose from, each with its own advantages: Matte paint Offers a non-reflective finish, ideal for hiding imperfections on your walls. It’s perfect for low-traffic areas like bedrooms and living rooms. Gloss paint Highly durable and easy to clean, making it perfect for high-traffic areas like kitchens and bathrooms. However, it can highlight imperfections on the walls. Semi-Gloss paint It provides a balance between durability and aesthetic appeal, making it suitable for trim and doors. Acrylic paint Known for its durability and ease of application, acrylic paint is a popular choice for various interior surfaces. Enamel paint It offers a hard, durable finish that is resistant to wear and tear, making it ideal for areas exposed to heavy use. Durability and sheen Durability is a key factor when choosing interior paints. High-traffic areas like hallways and kitchens require paints that can withstand wear and tear. The sheen level of the paint also affects its durability: High gloss It is very durable and easy to clean, but it can highlight wall imperfections.  Semi-gloss Durable and easier to clean than matte finishes, suitable for doors and trim. Matte finish Hides imperfections well but is less durable and harder to clean. Best interior paints for different rooms Different rooms in your home have different requirements when it comes to paint. Here’s a guide to choosing the best interior paints for various parts of your home: Best paint for kitchens and bathrooms Kitchens and bathrooms are high-traffic areas that require durable and easy-to-clean paints. Here are some top choices: Dulux kitchen and bathroom paint Specifically designed for kitchens and bathrooms, this paint offers excellent durability and resistance to moisture and mildew.  Taubmans endure interior walls It offers superior washability and stain resistance, making it perfect for kitchens and bathrooms. Wattyl kitchen & bathroom paint Provides a tough, durable finish that resists moisture and mildew growth.  Best paint for living rooms and bedrooms Living rooms and bedrooms are typically low-traffic areas where aesthetics and comfort are key. Here are some recommendations: Dulux wash&wear Known for its ease of application and smooth finish, it is perfect for living rooms and bedrooms. Haymes ultra premium interior Offers a low-sheen finish that creates a warm and inviting atmosphere in living rooms and bedrooms. Taubmans endure flat Provides a matte finish that hides imperfections and creates a cosy feel. Best paint for ceilings Ceilings require a specific type of paint that offers good coverage and a smooth finish. Here are some top choices: Dulux ceiling white Provides excellent coverage and a smooth, even finish. Taubmans easycoat ceiling Offers a low-sheen finish that hides imperfections and creates a clean, crisp look.  Wattyl ultra cover ceiling paint Provides a high-opacity finish that covers imperfections and ensures a uniform look. Best paint brands in Australia Australia offers a variety of paint brands, each with its own strengths and specialities. Here’s a closer look at some of the best paint brands in the country:  Dulux Dulux is one of the top rated interior paint brands in Australia, known for its high-quality paints and extensive colour range. Since 1918, Dulux has been in business. With several tin sizes available depending on the product, Dulux’s paint line is divided into Wash & Wear, Weathershield, UltraAir, Design Effects, Precision, Professional, and Renovation. With over 4,800 colours for indoors, outside, and everything in between, you have a variety of colours to choose from. Dulux paints are known for their durability and ease of application, making them a favourite among DIYers and professionals. Taubmans Taubmans is another leading top rated interior paint brand in Australia, offering a wide range of interior and exterior paints. Professionals and do-it-yourselfers can choose from a wide range of paints from Taubmans, including paint for ceilings, doors and trim, exteriors, interiors, prep, trade, and textures. The paint ranges are further divided into categories like Taubmans All Weather, Paint + Prime, 3-in-1 Prep, Sunproof, Endure, and Easy Coat. Taubmans Endure, for example, is known for its superior washability and stain resistance, making it ideal for high-traffic areas. British Paints British Paints offers a range of affordable and reliable interior paints. Their 4 Seasons range is particularly popular, providing excellent coverage and durability. British Paints has been in business for more than 80 years and offers a wide range of colours and tin sizes for prep, exterior, interior, enamel, ceiling, and deck paints. You can find their paints online. British paints are further divided into water-based and oil-based paints, as well as flat paint, matte, low-sheen, gloss, low odour, and semi-gloss sheens. Some paints even have extra features, like the Wear & Tear Fighter line, which helps shield your home’s exterior from Australian weather. Therefore, they can be considered as one of the

Blog

How to Dispose of Paint Responsibly: A Comprehensive Guide

Home Services Painters Near Me Artarmon Chatswood St Ives Surry Hills About Our Work Blog Contact Home Services Painters Near Me Artarmon Chatswood St Ives Surry Hills About Our Work Blog Contact Home Services Painters Near Me Artarmon Chatswood St Ives Surry Hills About Our Work Blog Contact 0404 213 224 Blog July 30, 2024 At Final Finish Painting, we believe in more than just transforming spaces with vibrant colours; we are committed to protecting the environment and ensuring the safety of our communities and Australia at large. Proper paint disposal is an important aspect of our work, and we want to share our expertise with you. This comprehensive guide will walk you through the essential steps of disposing of paint responsibly, from identifying the type of paint to cleaning containers and exploring recycling options. By following these best practices, you can help reduce environmental hazards and contribute to a cleaner, safer world.  Understanding paint disposal Proper paint disposal is necessary for protecting the environment and ensuring safety in our communities. Paint contains chemicals that can be hazardous if not handled correctly. It doesn’t matter if you are a DIY enthusiast or a professional painter; knowing how to dispose of paint properly is essential. Why paint disposal matter? Improper paint disposal can lead to significant environmental and health hazards. Paint contains harmful chemicals, including volatile organic compounds (VOCs), which can contaminate soil, groundwater, and air. Disposing of paint properly helps to prevent these hazards and ensures a cleaner and safer environment for everyone. Steps for safe disposal of paint Identify paint type Different types of paint require different disposal methods. Oil-based paints, for example, are considered hazardous waste and require special disposal. Latex paints are less harmful but still need to be disposed of properly. Use leftover paint Before considering disposal, think about ways to use leftover paint. You can use it for touch-ups or smaller projects around the house. If you have no immediate use, consider donating it to community groups or art programmes. Dry out paint If you have small amounts of leftover or unwanted paint, allow it to dry out before disposal. You can use cat litter or a paint hardener to speed up the drying process. Once the paint is dry, it can be disposed of with regular household waste. Recycling options Many local recycling centres accept paint for proper disposal. Always check with your local waste management facility or recycling centre for specific guidelines on paint disposal. Community collection events Participate in community collection events organised by local authorities. These events are designed to collect hazardous household waste, including paint, and ensure it is disposed of responsibly. Tips for cleaning paint containers Proper cleaning of paint containers is just as important as disposing of the paint itself. Here are some tips to ensure you clean your paint containers responsibly: Clean while wet It’s easier to clean paint containers while the paint is still wet. Use water for latex paints and a suitable solvent for oil-based paints. Dispose of cleaning solvents properly Never pour cleaning solvents down the drain. Collect used solvents in a container and take them to a hazardous waste disposal site. Reuse containers If possible, clean and reuse paint containers for future projects. This helps reduce waste and makes the most of the resources you have. Environmentally friendly cleaning tips Use eco-friendly cleaners Choose environmentally friendly cleaning products to minimise their chemical impact. Avoid excessive water use Be mindful of water usage when cleaning paint containers. Excessive water can spread paint residues and create additional environmental hazards. Dispose of rags and brushes properly Rags and brushes used for cleaning paint should be disposed of properly. Never throw them in the regular trash; take them to a hazardous waste disposal site. How to dispose of leftover paint safely   Leftover paint can be a challenge to get rid of, but there are several methods to ensure it is done safely and responsibly. Reuse and donate As mentioned earlier, reusing or donating leftover paint is a great way to reduce waste. Schools, community centres, and local art programmes often accept paint donations. Dry out small amounts For small amounts of leftover paint, allow it to dry out and dispose of it with regular waste. This prevents liquid paint from causing environmental hazards. Seal and store properly If you plan to store leftover paint for future use, ensure the lid is sealed tightly to prevent spills and evaporation. Store paint away from extreme temperatures and direct sunlight. Community involvement in paint disposal Organise community collection events Communities can organise collection events to gather leftover paint and other hazardous waste. This encourages responsible disposal and fosters community spirit. Educate residents Local governments and organisations can provide educational resources to inform residents about the importance of proper paint disposal. Tips for proper paint storage Proper paint storage is essential to prevent spills, extend the life of the paint, and ensure safety. Gotten from our painting contractors, here are some tips for storing paint correctly: Label paint cans Clearly label paint cans with the date of purchase and the colour. This helps you keep track of paint and prevents confusion. Store in a cool, dry place Store paint in a cool, dry place away from extreme temperatures. Avoid storing paint in damp areas or near heat sources. Seal cans tightly Ensure paint cans are sealed tightly to prevent air from entering and drying out the paint. Dispose of paint responsibly Proper paint disposal and storage are essential for protecting the environment and ensuring safety in our communities. With the ideas, tips and guidelines provided in this guide, we believe we have shown you how to dispose of paint appropriately and contribute to a cleaner, safer world. It doesn’t matter if you are reusing leftover paint, participating in community collection events, or storing paint correctly, every step you take makes a difference. Appropriate paint disposal will help create a better environment for future generations. If you need help with

Blog

How to Paint Aluminium for The Best Results

Home Services Painters Near Me Artarmon Chatswood St Ives Surry Hills About Our Work Blog Contact Home Services Painters Near Me Artarmon Chatswood St Ives Surry Hills About Our Work Blog Contact Home Services Painters Near Me Artarmon Chatswood St Ives Surry Hills About Our Work Blog Contact 0404 213 224 Blog July 30, 2024 Did you know that aluminium is a lightweight, strong, and corrosion-resistant metal that is frequently selected for a variety of applications? However, because of its non-porous surface and the oxide layer that covers it, painting aluminium can be difficult. This is because aluminium oxidises quickly, leaving behind aluminium oxide on the surface.  Although painting aluminium may be quite challenging, it’s not impossible. In fact, when you think about the benefits that come with painting every piece of aluminium you have, like protection from rust and moisture, you will do all you can to get it painted.  You don’t really need to go far to find out how to paint an aluminium sheet; this comprehensive guide seeks to inform you adequately on every step you need to take. As always, at Final Finish Painting, we are determined to make your property look its best all year round, so if you’re looking to give your home’s aluminium a different look, this guide is for you. Materials required to paint aluminium Before we begin, let’s have a look at the materials you might need. You should know that it can take a little more effort to paint aluminium than other materials. Additionally, special care must be employed to avoid harm or injury because self-etching primers and rough surfaces are involved. Before you get your brush and paint bucket, here are some materials you will need at hand: drop cloth gloves mild detergent eye wear (facial shield, safety glasses) To keep paint fumes out, use an air respirator with organic vapour cartridges sandpaper Brush, roller, or spray gun Self-Etching primer A spotless cloth Sealant for Enamel Acrylic or latex paint Step 1: Preparation Clean the aluminium surface thoroughly Before you begin painting aluminium to have a long-lasting, beautiful finish, preparation is essential. The first step involves cleaning the aluminium surface to remove any dirt, grime, or residue that could interfere with the paint adhering properly. Clean the surface using a mild detergent and water solution. This will help to eliminate any oil or dirt that might prevent the paint from sticking. Make sure to rinse the surface thoroughly afterwards to remove any soap residue. For a deeper clean, consider using a cleaner specifically designed for metal surfaces. This type of cleaner can help to remove stubborn dirt and grease. After cleaning, allow the surface to dry completely before moving on to the next step. Any moisture left on the surface can cause the paint to bubble or peel. Sand the aluminium surface Once the aluminium is clean and dry, the next step is to sand the surface. Sanding is essential because it creates a rough texture that allows the paint to adhere better. Use a fine-grit sandpaper (around 400-600 grit) to lightly sand the entire surface. Sanding will help to remove any oxidation or imperfections, ensuring a smooth and even finish. Be sure to wipe down the aluminium afterwards with a damp cloth to remove any dust or debris created during the sanding process. Allow the surface to dry completely before proceeding to the next step. Taking the time to properly sand and clean the aluminium will result in a much more durable and attractive finish. Step 2:Priming the aluminium Apply a high-quality primer Applying a primer is a key step when you paint aluminium. Primer helps the paint adhere to the aluminium and provides a smooth, even base for the topcoat. Choose a primer specifically designed for metal surfaces. These primers often contain anti-corrosive properties, which help to protect the aluminium from rust and other damage. To apply the primer, use a brush, roller, or spray gun, depending on the size of the surface you are working on. Make sure to cover the entire surface evenly and avoid leaving any bare spots. Allow the primer to dry completely, according to the manufacturer’s instructions. This drying time can vary, but it is essential to ensure the primer is fully cured before applying the topcoat. Sand and clean again if necessary After the primer has dried, inspect the surface for any imperfections. If you notice any rough spots or drips, lightly sand the area with fine-grit sandpaper. This additional sanding will help to ensure a smooth and even final finish. Once you have finished sanding, clean the surface again to remove any dust or debris. Make sure the surface is completely dry before moving on to the next step. Step 3: Applying the paint Choose the right paint and tools When it comes to choosing the paint for your aluminium surface, it’s important to select a high-quality product designed for metal surfaces. Acrylic latex paints are a great choice for their durability and ease of use. These paints are available in various finishes, including matte, gloss, and flat, allowing you to achieve the desired look for your project. Once you’ve selected the colour of choice, you can proceed to apply the paint. To apply the paint, you can use a brush, roller, or spray gun. Each method has its advantages, but for large surfaces, a spray gun can provide the most even and smooth finish. If you choose to use a brush or roller, make sure to use high-quality tools to avoid leaving brush marks or roller lines on the surface. Apply multiple coats for the best results For the best results, it’s important to apply multiple thin coats of paint rather than one thick coat. Start by applying a thin, even coat of paint to the aluminium surface. Allow this first coat to dry completely according to the manufacturer’s instructions before applying the next coat. This drying time can vary, but it is essential to ensure each coat

Scroll to Top